Saturday, December 12, 2015

Lighted Nativity Porch Sign

I love all of the big signs with fun Christmas phrases/words that everyone is posting this year and even after putting up Christmas lights, our porch needed something else. However, I have always wanted a Nativity scene for the front of the house and haven’t found the right one yet. So, I figured…combine the two!!

The best part: I had everything on hand (FREE!) and the whole project only took me a few hours!


Grabbing some old fence boards I had saved in the garage, I started by carefully removing all the rusty nails. I like the rustic look, so I just cleaned them up a bit and lightly sanded down the front. Then, I cut another board into three pieces that fit across the back of the four fence boards. Using wood screws, the boards were attached to the back of the sign.

I left the rough edges and the broken ends because I liked the old look it gave the sign, but you could cut the boards to make clean, straight ends.

I drew a rough sketch with a piece of chalk and filled in the background with a very watered down blue.

Using paint from my craft room stash (and brushes you don’t love…the old fence is pretty rough), I started filling in the chalk lines. I wanted it to look a bit primitive, so I kept the shapes simple and did not do any detail.

Once I was happy with the image, I used chalk to outline my lettering and then filled it in with a glossy black paint.
 

After seeing several mantel signs on Pinterest with lights, I knew I wanted to include that feature on this porch sign. So, I drilled several holes around the face of the sign and ran a string of lights around the back…putting a bulb through each of the holes I had previously drilled.


It was even prettier once it was in its spot on the porch!

And, just in time to plug it in for the evening….

 We love it and hope you do too!

Merry Christmas,


This post is linked to:
http://www.gingersnapcrafts.com/2015/12/wow-me-wednesday-236.html 
www.thegirlcreative.com/be-inspired-link-party-no-76/

Sunday, October 4, 2015

Help! I can't craft or cook!

Three weeks ago I had surgery on my right hand and elbow.  Being without one's dominant hand is downright annoying!  Had a whole week at home and couldn't even do anything crafty!! 

Even though I tried to plan ahead with freezer meals for recovery, it was just easier to drive-thru or order in.....especially after going back to work two weeks ago.  Now that I am able to use my arm and hand more -getting better each week- I am trying to get back into cooking at home.  But, by the time I get home, I'm exhausted and very sore. 

My son, T, prefers home-cooking and so does my waistline and pocketbook! We also like to use leftovers for our lunches.  With this in mind, I started looking through my recipes for quick dinners and things with few steps and easy cleanup. I also spent quite a bit of time on Pinterest.

Do you find yourself pinning recipes and never trying them?  I do that a lot.  I also hesitate sometimes wondering if they are really that tasty.  So, I thought I'd share with you a few of the recipes that we tried recently and really enjoyed.  They are easy to make and since they use minimal dishes, the cleanup is not a problem.

The first one is the "one pot pasta" that pops up in variations all the time.  T loves this easy Italian one from Domestic Superhero called "One Pot Wonder Tomato Basil Pasta":

We've made this one with both chicken and shrimp added and loved both.

This past week, a similar dish came up on my Facebook feed.  It was for a Cajun pasta with andouille sausage and chicken. Certainly not as healthy (with the heavy cream), but awfully tasty!!  It is equally as easy to make and again...only one pot to clean. 

The recipe can be made by following along with a YouTube video from Tasty entitled "One-Pot Cajun Pasta":  https://m.youtube.com/watch?v=LAA-ipqbv14


The next recipe from Thirty Handmade Days is a super simple one-skillet dish that I have pinned and unpinned a few times. The recipe just seemed too simple and I honestly thought it'd be bland. 
I couldn't have been more mistaken!  This simple dinner is really yummy!! My son and I ate leftovers today (reheats well). 
Plus, the name is so fun!  Who isn't curious about a dish called: "Porcupines in a Skillet"? 

I've got a Dr. Pepper pork roast in the crockpot now...smells delicious.  Plan to use leftovers to make pulled pork sandwiches this week using my Uncle Juven's famous homemade BBQ sauce. Yum!   I'll let you know how it turns out.


Tuesday, June 9, 2015

DIY Personalized Shower Wrap


It's that time of year....school is out and Summer is here, but not before GRADUATION! 
My cousin graduated from High School this past weekend and will head off to college in the Fall. 
I wanted to make her a personalized gift that she'd be able to use in the dorm.  After a little Pinterest search, I saw it.....a shower wrap!  Perfect for a community bath dorm.


After checking out several links and tutorials, I liked this one the best: http://ofdwellinganddress.blogspot.com/2013/04/diy-towel-wrap.html

I won't go through the steps because her tutorial is great, but I did take a few pictures along the way.

The towel I used was a regular bath towel from Walmart in a pretty teal color. 

It was easy to make the elastic casing and I love the extra security that having elastic in back gives.
 
Great Velcro closure:

Rather than use my embroidery machine (it only does 4x4 or smaller), I opted to just free-hand the monogram initial and appliqué it using a zig-zag stitch.  (Funny thing that the tutorial monogram is also a "K".)

For a final feminine touch, I stitched a bow at the top where the wrap closes. 

The finished product:

I think it turned out really cute and my cousin loved it! 

Cost breakdown:
Towel....$3.97
Velcro....from my stash
Elastic....$2.97
Ribbon....$2.97/roll (only used a small piece)
Fabric....from my scrap stash

So, basically, about $10. The gift shop at the hospital where I work has one of these wraps for sale (not really any fancier than the one I made) for over $35!! Crazy, right?

I think I may be making one for myself soon. And, I will definitely be keeping this project in mind for future gifts...great as a swimsuit coverup too. 

Happy Summer!
Julie


Wednesday, June 3, 2015

Our Minecraft Party!

My son turned 13 last week!  Eeeeek! I have a teenager! 

This year instead of a birthday trip, he asked for a party with a few of his best pals....specifically, the handful of boys that play video games together.  We opted to hire a Game Truck for the first two hours of the party. It was terrific! The guys (including my 43 year-old boyfriend) had a lot of fun and the game host was great. 

While the majority of the party, the guys were having a Halo battle in the Game Truck.....inside the house was all Minecraft! 


Thanks to a lot of Pinterest searches (I have a whole board for it.), I was able to come up with some fun Minecraft-themed ideas for the big day.  The boys enjoyed them all. 

I bought the green water bottles at a local Five Below store and had my mother cut the vinyl Creeper faces out on her Cricut. The boys filled them with candy from our themed candy bar before they left the party. 

The little food signs are from the free printables provided by: http://www.beingfibromom.com/minecraft-birthday-party


The great birthday banner is from: http://www.thepartyanimal-blog.org/free-printable-minecraft-party-banner/
As you can see above, we turned the kitchen table into a Minecraft "crafting table" using a roll of brown wrapping paper (leftover from shipping packages) and black electrical tape.  The boys thought this was funny and recognized it right away from the game. 

When it came time to eat, we opted for Creeper Pizza!  Got the idea for the pizzas from: 
http://catchmyparty.com/blog/9-awesome-minecraft-party-activities


There are tons of Minecraft cake ideas out there, but my son liked this idea best.  We constructed our blocks from Jello squares, Rice Krispie Treats, and brownies with green frosting.  The little pig was a free paper folding project I also found on Pinterest.

The best part (I think) was our entryway:

Complete with cardboard torches, it turned out as a terrific entry to the party! We used this as our photo spot and made sure to get the birthday boy (wearing the Steve head) in a photo with each guest. The guests enjoyed the props and posing with the Creeper.  My son and my mother built the Creeper out of boxes and a green plastic tablecloth.


The photo prop masks came from: http://www.madebyaprincessparties.com/2014/11/make-your-own-minecraft-photo-props/


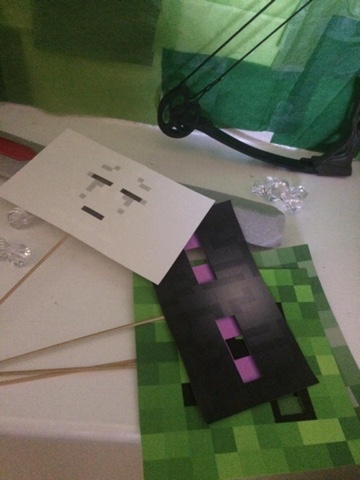
The "diamonds" were leftover from my Tin Can Scarecrow project this past Fall. I scattered them in the entryway nook along with a couple of foam swords, a bow and arrow set, the masks, and a box wrapped and labeled to look like TNT. I constructed the background using tissue paper cut into squares and simply taped to the wall. 


I made the torches using a clothing gift box....the lid for one and the bottom of the box for the other. I wrapped them both in brown paper and added a strip of yellow paper to the top.  I found some red sparkly tissue paper in my stash to use for flames. 

So many ideas and most of them were utilizing things I already had around the house....love that!  We had a great time and created some wonderful memories....and that is what matters!

even did a Creeper manicure!

If you have a Minecrafter in your house, be sure to check out my Pinterest board or the above links for more ideas.

Julie


Friday, January 30, 2015

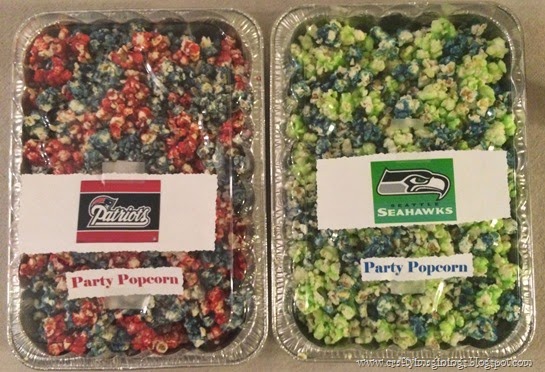
Party Popcorn for the Super Bowl (or any party)!

It’s almost game day!  Need a new snack idea for your Super Bowl XLIX party?
How about some flavored popcorn in the team colors?
Super Bowl Party Popcorn
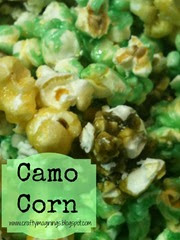
I wanted to do something fun for my guy to take to his Super Bowl party this weekend.  I searched Pinterest for ideas and was finally settling on cupcakes…when inspiration struck!  I saw my own pin for the Camo Corn I made a couple of years ago for my son’s school class.  CamoCorn 1
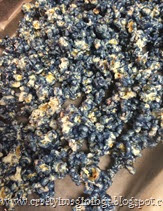
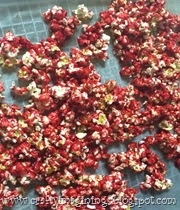
I’ve made this recipe before in other colors (pink and purple for my niece’s birthday, blue and white for my son’s school colors), so I knew the possibilities were fairly endless.

IMG_6618IMG_6623IMG_6625


A few ingredients and bags of microwave popcorn later and voila: Super Bowl Party Popcorn!

IMG_6643

This time I used Jolly Rancher brand gelatin.  The Jolly Rancher brand made these batches quite sweet but my son thinks they are delicious!  And, I love the more vibrant colors.
The recipe I used is here.

Hope you enjoy your Party Popcorn!
DSCN7111


This post is linked to:

Friday, January 9, 2015

Tin Can Scarecrow

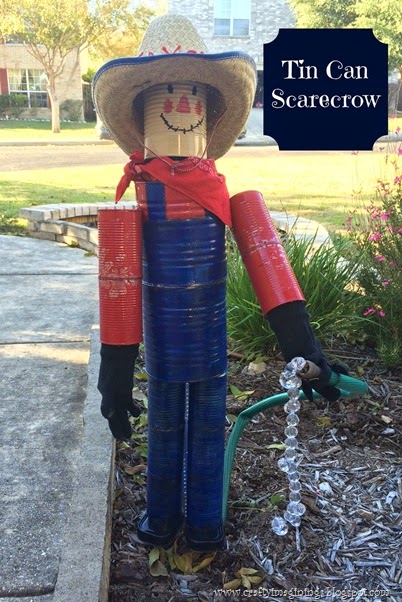
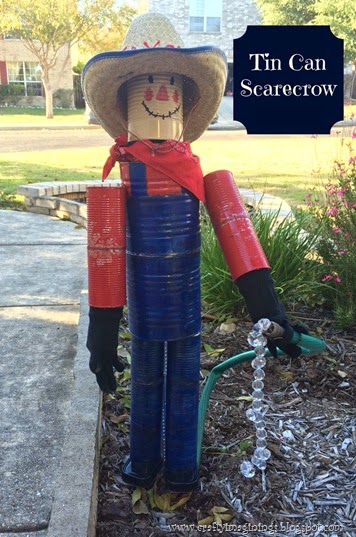
A fun project I completed around Thanksgiving was this Tin Can Scarecrow:Tin Can Scarecrow
My boyfriend’s parents have a large vegetable plot in a community garden, but no scarecrow….we couldn’t have that!  I scoured Pinterest for ideas for a traditional scarecrow and along the way, I found some cute photos of tin can and recycled material scarecrows.  How fun is that? 

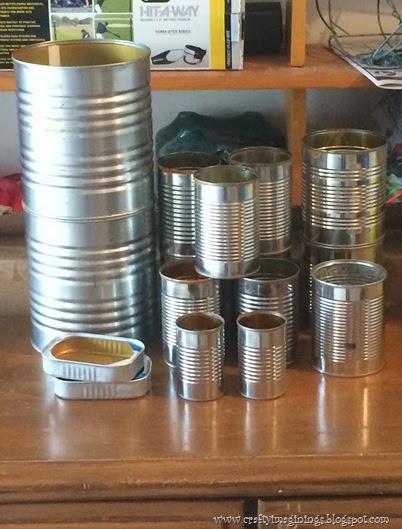
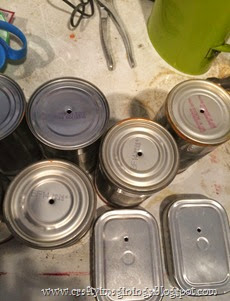
So, I started saving cans and asked a friend with a restaurant to save me a couple of large cans.  After cleaning them and removing labels, I had a pretty good pile so I could start designing my little tin man.IMG_5481
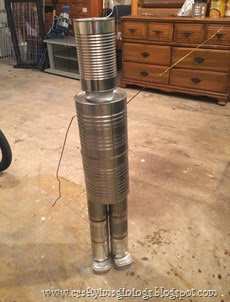
After drilling holes in the bottoms of the cans, I used wire and screws to secure them to one another.  For additional security, the seams were sealed too.  There is a good tutorial for this here: https://au.lifestyle.yahoo.com/better-homes-gardens/diy/h/18048897/how-to-make-a-scarecrow-scare-bot-style/
IMG_5482
IMG_5504


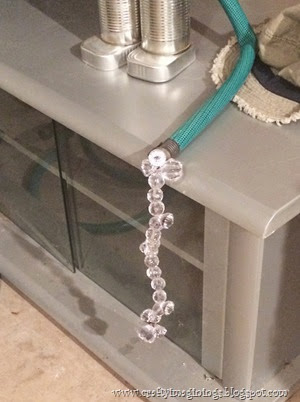
Using a old water hose, I cut a long piece and ran a coat hanger through it so that I could bend the hose and make it look like the little man is watering the garden.  The “water” is made by stringing clear plastic beads on a wire and attaching it to the coat hanger inside the end of the hose.  Saw this awesome idea here: http://www.hometalk.com/195847/yard-art-recyclingIMG_5520
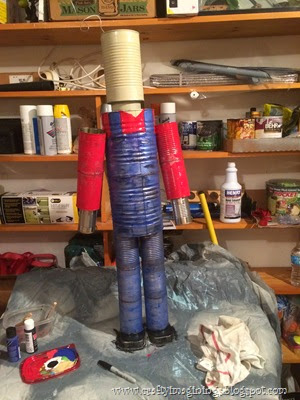
I painted the whole thing with acrylic paints and then gave it several coats of a clear spray-on sealer.  The bandana and hat were in an old box of play hats and items my son had when he was little. IMG_5521
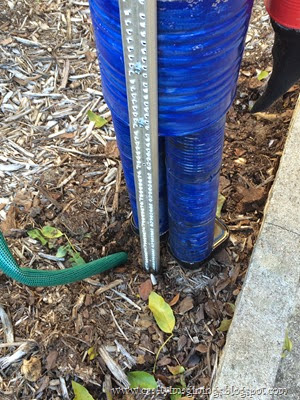
In keeping with the recycled theme, I used a leftover piece of a metal transition strip (that piece that is used to transition between tile and carpet).  It fit perfectly and I was able to screw it easily and securely to the back of the little man. IMG_5545
I placed him in my front flower bed just to adjust the angle of the water hose and snap a few pics.  Tin Can Scarecrow
I gave the Tin Can Scarecrow to my boyfriend’s mother on Thanksgiving and she really liked him!  We think he will be a popular addition to her community garden!

Happy Gardening!
DSCN7111


This post is linked to:
http://staceyembracingchange.com/2015/01/08/creative-inspirations-linky-party-117/
http://www.myrepurposedlife.com/2015/01/catch-as-catch-can-195.html
http://www.gingersnapcrafts.com/2015/10/wow-me-wednesday-226.html?m=1